
7.8 KiB
- 1. 138_lama_cpp
- 2. The test of llama.cpp
- 3. References
- 4. Create the project
- 5. Initial .gitignore
- 6. commit back to Forgejo server
- 7. create a source dir
- 8. Build llama-server and llama-cli
1. 138_lama_cpp
2. The test of llama.cpp
3. References
3.0.1. gemma reference
3.0.2. unsloth Gemma 4 docs
3.0.3. hugging Face site
3.0.4. related google voice assistant
related google voice assistant
4. Create the project
4.1. On the Forgejo Server
- sign in with
- stephen
password Forgejo2026$$
Create a blank repository
https://dev.oxnee.com./stephen/138_llama_cpp
4.2. clone development machine
In a Mac terminal create the blank project
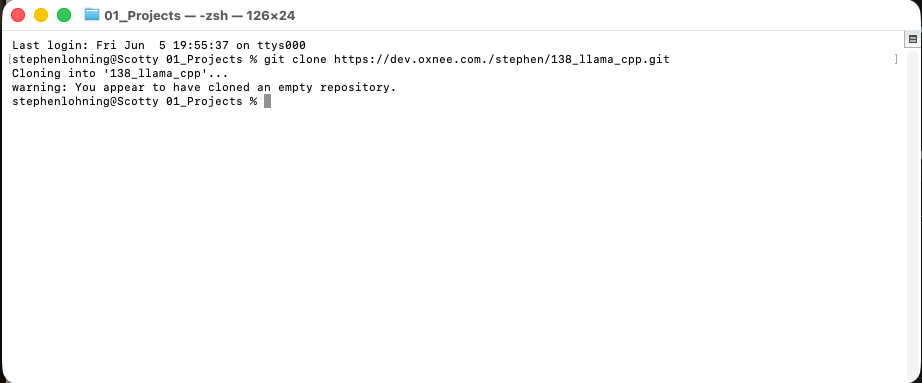
Now we have a blank repository
stephenlohning@Scotty 138_llama_cpp % tree -a
.
├── .git
│   ├── HEAD
│   ├── config
│   ├── description
│   ├── hooks
│   │   ├── applypatch-msg.sample
│   │   ├── commit-msg.sample
│   │   ├── fsmonitor-watchman.sample
│   │   ├── post-update.sample
│   │   ├── pre-applypatch.sample
│   │   ├── pre-commit.sample
│   │   ├── pre-merge-commit.sample
│   │   ├── pre-push.sample
│   │   ├── pre-rebase.sample
│   │   ├── pre-receive.sample
│   │   ├── prepare-commit-msg.sample
│   │   ├── push-to-checkout.sample
│   │   ├── sendemail-validate.sample
│   │   └── update.sample
│   ├── info
│   │   └── exclude
│   ├── objects
│   │   ├── info
│   │   └── pack
│   └── refs
│       ├── heads
│       └── tags
└── doc
    ├── Notes.md
    └── images
        └── image01.png
It has only a local git repository
stephenlohning@Scotty 138_llama_cpp % ls -la
total 0
drwxr-xr-x@   3 stephenlohning  staff    96 Jun  5 20:21 .
drwxr-xr-x@ 158 stephenlohning  staff  5056 Jun  5 20:21 ..
drwxr-xr-x    9 stephenlohning  staff   288 Jun  5 20:21 .git
stephenlohning@Scotty 138_llama_cpp % git remote -v
origin  https://dev.oxnee.com./stephen/138_llama_cpp.git (fetch)
origin  https://dev.oxnee.com./stephen/138_llama_cpp.git (push)
I usually create a folder call doc and a folder below that for images
5. Initial .gitignore
./.git
.DS_Store
6. commit back to Forgejo server
It shows 4 file commit them all
7. create a source dir
In vs code terminal
tephenlohning@Scotty 138_llama_cpp % mkdir src
stephenlohning@Scotty 138_llama_cpp % cd src
stephenlohning@Scotty src % git clone https://github.com/ggml-org/llama.cpp .
Cloning into '.'...
remote: Enumerating objects: 98051, done.
remote: Counting objects: 100% (204/204), done.
remote: Compressing objects: 100% (108/108), done.
remote: Total 98051 (delta 128), reused 100 (delta 96), pack-reused 97847 (from 3)
Receiving objects: 100% (98051/98051), 395.99 MiB | 22.23 MiB/s, done.
Resolving deltas: 100% (69995/69995), done.
stephenlohning@Scotty src % git remote -v
origin  https://github.com/ggml-org/llama.cpp (fetch)
origin  https://github.com/ggml-org/llama.cpp (push)
8. Build llama-server and llama-cli
My MacBook Pro already has a cpp compiler which was install with Xcode.
Step 1: Install CMake via Homebrew You can run this right from where you are now to get the build tool your system is missing:
brew install cmake
Step 2:Jump Back into your llama.cpp Directory Once brew finishes installing CMake, navigate back into the source repository directory where you cloned the code:
cd 138_llama_cpp/src
Step 3: Run the Modern Build Stream Now that your terminal is in the correct directory and CMake is ready, initialize and compile the project by running these two steps in sequence:
# 1. Configure the build for your Apple Silicon Mac
cmake -B build

# 2. Compile the binaries using all your CPU cores
cmake --build build -j --target llama-cli llama-server
Once that hits 100%, your compiled binaries will be built and ready to go inside the build/bin folder.
Fantastic! The compilation log looks beautiful. CMake successfully detected your Apple Silicon layout (arm64), hooked into macOS’s native Accelerate framework, and fully compiled the Metal backend (libggml-metal.dylib). This means the model will run beautifully utilizing your Mac's integrated GPU and Unified Memory.
It even compiled the new built-in SvelteKit web front-end (llama-ui) for you.
8.1. Attempting to get GGUF file and run
8.1.1. -This did not work there a few more tries but none of these worked, maybe because 8G file
Now you can immediately spin up the model. Since llama.cpp has a built-in automated downloader, you don't need a separate tool anymore. Run this command from your current /src directory to download the Gemma 4 12B Q5_K_M model and start the server:
./build/bin/llama-server -hf ggml-org/gemma-4-12B-it-GGUF:gemma-4-12b-it-Q5_K_M.gguf --port 8080 -c 8192 --n-gpu-layers 99
8.2. What happens next?
The Download Begins: llama-server will start fetching the ~9.5 GB file directly from Hugging Face and show you a download progress bar right in the terminal window.
Metal Acceleration Boots: Once downloaded, it will initialize the context (-c 8192 sets an 8k token window) and offload all 99 layers (--n-gpu-layers 99) entirely onto your Mac's graphics pipeline.
The Web UI is Live: Open up your browser and head to http://localhost:8080. You'll be greeted by the natively built chat interface where you can interact with Gemma 4 locally.
8.3. Now install gguf file
Ths worked
8.3.1. Step 1: Download the File via curl
Stay right where you are in the src directory, and run this command. It downloads the file straight from Hugging Face's servers and saves it directly into your models directory:
curl -L -o models/gemma-4-12B-it-Q5_K_M.gguf "https://huggingface.co/bartowski/gemma-4-12B-it-GGUF/resolve/main/gemma-4-12B-it-Q5_K_M.gguf"
8.3.2. Step 2: Launch the Server Region Locally
Once the download finishes, use the local model flag (-m) instead of the buggy Hugging Face flag (-hf). This tells llama-server to read the file straight from your hard drive:
./build/bin/llama-server -m models/gemma-4-12B-it-Q5_K_M.gguf --port 8080 -c 8192 --n-gpu-layers 99
This will bypass the network lookup code entirely, instantly load the model into your Mac's unified memory via Metal, and open up your port listener at http://localhost:8080.